Castor Oil Packs

Castor oil, applied topically to the skin, has been shown to increase circulation, support detoxification, improve elimination, and support the healing of tissues and organs. It is particularly supportive to the lymphatic system, which in turn helps improve digestion, boost immune function, and reduce swelling and inflammation.

Studies have found that castor oil is:

  • Anti-diabetic
  • Anti-inflammatory
  • Antimicrobial
  • Antioxidant
  • Hepatoprotective (ability to prevent damage to the liver)
  • Free radical scavenging
  • Wound-healing

Conditions that respond well to topical castor oil packs include:

  • General detoxification
  • Intestinal disorders: constipation, loose stools, poor elimination
  • Liver and gallbladder disorders: fatty liver disease, gallstones
  • Gynecological conditions: irregular periods, uterine fibroids, ovarian cysts, urinary
  • symptoms, PMS
  • Lung congestion, asthma, bronchitis and during acute colds and flus
  • Arthritis
  • Backache
  • Muscle aches
  • Parasitic infections
  • Chronic headaches
  • Gallbladder pain
  • Rheumatism
  • Sleep problems like insomnia

One of the major reasons castor oil has strong immune-enhancing effects is because it supports the body’s lymphatic system. The most significant role of the lymphatic system is that it absorbs and removes excess fluids, proteins and waste materials from our cells.

Castor oil may be able to help improve lymphatic drainage, blood flow, thymus gland health and other immune system functions.

A small, double-blind study published in the Journal of Naturopathic Medicine found that adults who used abdominal castor oil packs had significant increases in the production of lymphocytes compared with patients using placebo packs. Lymphocytes are the immune system’s natural “disease-fighters” that attack outside invaders such as toxins, bacteria and other perceived threats.

The lymphatic system also impacts the circulatory and digestive systems, which is why the oil is sometimes used to support heart health and resolve issues like constipation.

A healthy lymphatic system and proper blood flow go hand in hand. When the lymphatic system fails (or edema develops, which is the retention of fluid and toxins), it’s much more likely someone will have circulatory issues.

This is due to the fact that the lymphatic circulatory system works directly with the cardiovascular circulatory system to keep blood and lymphatic fluid levels in an optimal balance.

According to the National Heart, Lung, and Blood Institute, “A growing body of evidence reveals that the lymphatic system influences the health of multiple organs, including the heart, lung, and brain.”  So castor oil’s ability to positively affect our lymphatic systems likely means better overall circulation and a health boost to major organs like our hearts.

Lab studies have shown that castor oil is effective against many types of bacteria, including Staphylococcus aureus, Escherichia coli and Pseudomonas aeruginosa. Out of all the staphylococcal bacteria, Staphylococcus aureus is considered the most dangerous and can cause mild to serious skin infections and other concerning staph infection symptoms.

Applying essential oils to the skin before applying the castor oil increases the benefits of the castor oil pack. Choosing essential oils that aid the system one is targeting, can be very beneficial. I only recommend Young Living essential oils for this or any application.

How to do a Castor Oil Pack

What you’ll need:

  • Organic, cold-pressed castor oil (16 – 32 ounces) – https://amzn.to/3C00Hmg
  • Flannel cloth – wool flannel is preferred, although cotton can be used in case of a wool allergy – wool flannel – https://amzn.to/3S6D557, organic cotton flannel – https://amzn.to/3UxWo8L
  • Castor oil pack holder – https://amzn.to/3dzp9l3
  • Hot water bottle or heating pad – https://amzn.to/3Uzf6ge
  • If using essential oils I recommend Juvaflex over the liver and Digize over the abdomen. If focusing on lungs, I recommend RC or Raven over the chest – Browse or Shop Here. Use code ShareYL at checkout to save 10% off your first order. Message me so I can help you order, connect you with my education groups, send you a gift, and if your order is 100PV or more on Loyalty you’ll also have access to my Breaking Through Community.

Instructions:

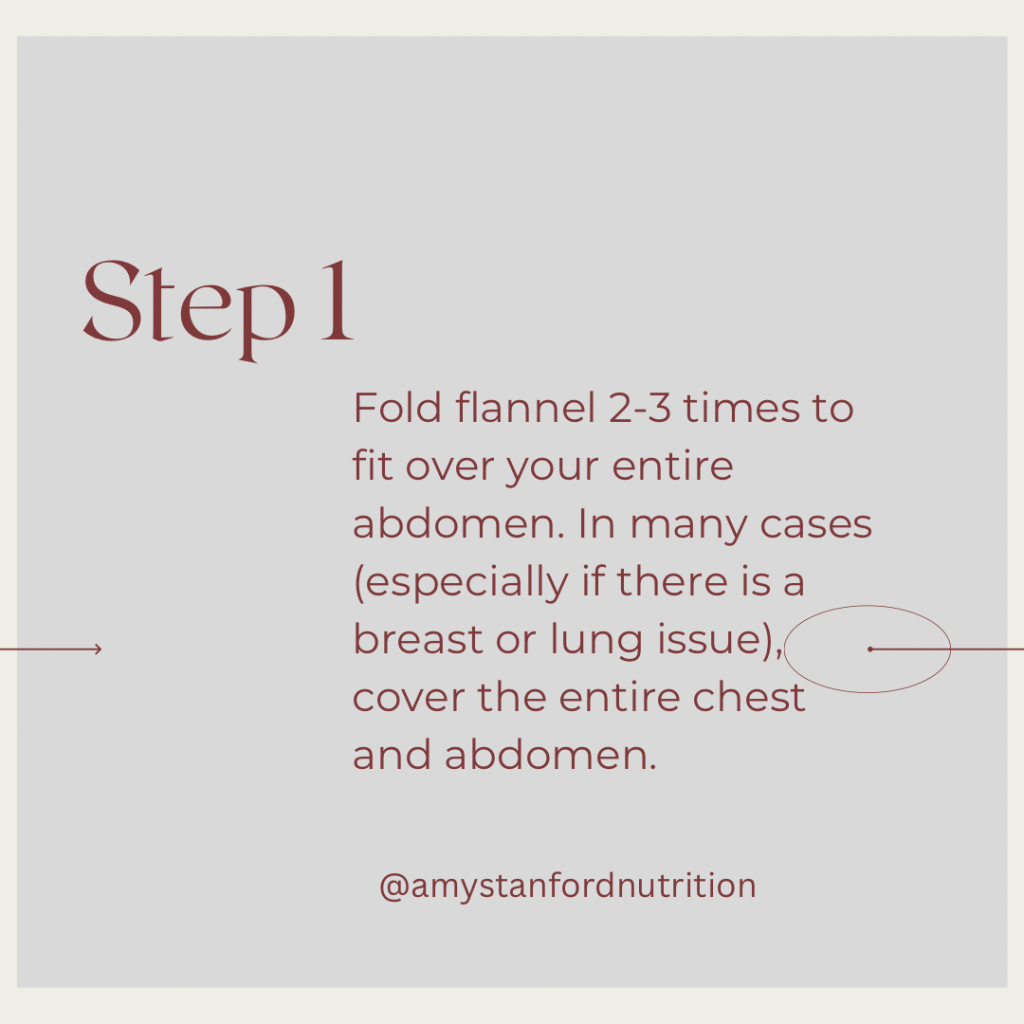
  1. Fold flannel 2-3 times to fit over your entire abdomen. If there is a breast or lung issue, cover the entire chest and abdomen.
  2. Drizzle approximately 2 tablespoons of castor oil onto the flannel. The first couple of weeks you use the pack you will have to add an additional tablespoon of oil about every 3-4 days. Eventually, the pack will be saturated enough that reapplication of oil should only be necessary every 1-2 weeks. The pack should not be dripping with oil. As an example, it should have just enough oil to make a slight oil mark on furniture as if you were going to polish it.
  3. Lay an old towel out on the surface you will be lying on. This will prevent staining.
  4. If using essential oils apply to areas where you will be placing the castor oil pack.
  5. To prevent doing the castor oil pack on a full stomach, it is best to do it 2-3 hours after a meal.
  6. Ideally, lie on your back with feet elevated placing flannel over entire abdomen. Cover with a towel and then place a hot water bottle or heating pad on top. In lieu of a towel use a castor oil pack holder.
  7. Leave pack on for 45 – 60 minutes, or as long as you like. Relax, sleep, read, practice breath work, whatever you’d like during this time.
  8. After finishing, if necessary, you can remove the oil from your skin or leave it on the skin to be totally absorbed over time. (NOTE – there should only be a VERY thin film of castor oil on the skin when you finish the treatment).

Notes:

  • Castor oil packs can be used frequently, up to daily if needed.
  • Castor oil pack treatments are gentle, with no side effects.
  • Store the pack in a large zip-lock bag. Reuse the pack many times, adding more oil as needed to keep the pack saturated. Replace the pack after it begins to change color (usually several months).
  • For maximum effectiveness, it is necessary to apply the pack as often as possible. Try for at least 4 consecutive days per week for at least 4-6 weeks.
  • To clean the pack – begin by soaking the pack in a solution of baking soda and hot water, using four ounces of baking soda to two quarts of water. After soaking the pack for at least 20 minutes, wring it out thoroughly and allow it to air dry.
  • Do not use on abdomen during pregnancy or menstruation.

Simple Food Swaps

There are so many things to think about as a parent. I know, I feel ya! You probably know there are some super simple food swaps you can make to create a healthier pantry and a healthier family. But since “Reading Food Labels” isn’t a major in college or even a high school course, you may not know how to make healthier choices when shopping! Below are some simple food swaps you can make when shopping to eliminate some of the ingredients that cause huge health issues in ourselves and our children. And bonus, all of these swaps are gluten, casein, and soy free, and also organic! Yay!

Options for healthier ketchup, taco seasoning packets, snacks, a soy sauce alternative, a healthier nut butter, chicken broth, my kids’ favorite organic gluten free noodles, a super clean organic salad dressing/marinade, our favorite gluten free tortillas, super yummy, allergen free, organic chocolate, spices, and my favorite organic spaghetti sauce are below! Enjoy!

When navigating food labels on your own you want to steer clear of:

  • High fructose corn syrup
  • Trans fats
  • GMO’s
  • Artificial colors
  • Artificial flavors
  • Table salt
  • Preservatives
  • Nitrates/Nitrites
  • MSG
  • Artificial Sweeteners
  • Pesticides, herbicides, fungicides, glyphosate (choose organic)

Enjoy these simple food swaps! And if you make a swap, let me know in the comments below!

Hu Chocolate – delicious, organic, clean ingredients! – https://amzn.to/35Cz3Lu

Simply Organic Spices – https://amzn.to/2HbT3vx

Looking for organic, local produce, grass fed organic meat, poultry, etc, organic bakery items, and more delivered to your door? We love our weekly Farm Fresh to You box! We choose the organic, local items we want delivered each week! They even have gift items, baking items, treats, and everything in between! For $15 off your first delivery use code AMYS4349! Visit www.farmfreshtoyou.com to grab your own box!

Homemade Bath Bombs

Can we all agree to stop buying the colorful bath bombs we see everywhere? Almost all bath bombs we can purchase online and in stores contain ingredients known to cause allergies, eczema, migraines, UTI’s, hyperactivity, infertility, hormone disruption, and even cancer.

So many of the ingredients in these readily available bath bombs, and every other product, are known to cause these issues in our babies, kids, and ourselves, and yet they’re totally normalized in our society.

$2.75 sounds like a great price point for stocking stuffers, birthday gifts, Easter basket goodies, etc., but be careful with all the hidden side effects. Is a cheap product worth major health problems? I would say no!

And, its soooooo easy and inexpensive to make your own bath bombs! I am so not a DIY gal and even I made these and plan on continuing to make them for myself and my daughters, and as gifts! The pictures are from my very first batch ever so I know I will get better each time! If I can do it, you can too!

Just like you would with food, take a moment to read the ingredients on your products before putting them in your cart, because what goes ON the body, ON the skin, our largest organ, goes IN the body.

Here’s your cheat sheet of what to start avoiding:

  • Parabens
  • Synthetic Colors and Dyes (all numbers)
  • Fragrance/Perfume/Parfum
  • Pthlalates
  • Sodium Lauryl Sulfate (SLS)/Sodium laureth sulfate (SLES)
  • Propylene Glycol
  • PEGs (of any kind)
  • Petroleum and Petroleum byproducts
  • DEA/MEA/TEA
  • Methylisothiazolinone (MIT)

Want more information on creating a Healthy Home by switching out your toxic products for safe products? Watch this short video where I talk about this – https://youtu.be/BChmDL3RFuc, or message me at amystanfordnutrition@gmail.com for a more in depth class recording I can send you!

In the meantime here’s the recipe I used! Enjoy!

INGREDIENTS

  • 1.5 cups baking soda –
  • 1 cup citric acid –
  • 1/2 cup refined coconut oil – , if you want them coconut smelling, use unrefined –
  • Young Living Essential Oils of choice – I used 40 drops of lavender for my first batch and it is lovely. In the future I plan to make some muscle soak bath bombs, detox bath bombs, and other combinations with my essential oils – to snag some Young Living lavender or other oils click here –https://www.youngliving.com/us/en/referral/3136396
  • If you’d like to change the colors of your bath bombs try using beet juice, blueberry juice, carrot juice, or these natural food colorings –

INSTRUCTIONS

  • Combine dry ingredients in a bowl
  • Melt your coconut oil
  • If you’re using food coloring, add it to the melted coconut oil and mix
  • Now add your essential oils to the melted oil
  • Add coconut oil mixture to the dry ingredients and mix
  • Add mixture to your molds of choice
  • Freeze for 15 – 20 minutes
  • Remove from molds and enjoy

Here’s the molds I used –

These would be great for Valentine’s Day gifts –

Pumpkin Bread – gluten, dairy, soy free

The most moist, delicious pumpkin bread ever! My kids and I love this recipe! Give it a try and let me know how you like it!

Ingredients:

  • 1 cup of organic Pure Pumpkin
  • 1/2 cup organic coconut oil (melted)
  • 1 1/3 cup organic sugar (of choice)
  • 2 organic pastured eggs
  • 1.5 cups gluten free flour
  • 1/2 t non-aluminum baking powder
  • 1/2 t sea salt
  • 1/2 t non-aluminum baking soda
  • 1 drop of Young Living Cinnamon Bark essential oil
  • 1 drop of Young Living Nutmeg essential oil
  • 1 drop of Young Living Clove Oil

Directions:

  1. Preheat the oven to 350 degrees. Flour and grease loaf pan.
  2. Mix together pumpkin, oil, sugar, and eggs in a bowl. Add the flour, baking powder, salt, baking soda, and spices. Stir until well blended.
  3. Add batter to pan.
  4. Bake for 45 – 60 minutes. Mine took 60 minutes
  5. Allow to cool for 5 minutes and move to cooling rack

Grab the Young Living oils to make this recipe HERE. Use code ShareYL at checkout to save 10% off! Then email me at amystanfordnutrition@gmail.com and I’ll send you diffuser recipes, and other ways to use them!

Gluten, Dairy, Soy Free Pumpkin Pie

Who loves pumpkin pie? I sure do! And of course my pumpkin pie is always gluten, dairy, and soy free! Enjoy this gluten, dairy, and soy free Pumpkin Pie recipe featuring Young Living oils! Don’t have Young Living oils? Use organic spices instead or order some below!

Ingredients

• 2/3 cup organic sugar or sweetener of choice

• 2 drops Young Living Cinnamon Bark oil

• 2 drops Young Living Nutmeg oil

• 2 drops Young Living Clove oil

• 1/2 teaspoon sea salt

• 1 15 oz can of organic pumpkin

• 2 organic pastured eggs

• 1 cup organic full-fat canned coconut milk

• 1 recipe gluten-free pie crust of choice, unbaked – see options below

Instructions

• Preheat the oven to 425 F.

• In a medium bowl, whisk together all the ingredients for the filling until smooth and fully combined.

• Pour filling into the unbaked pie shell – pouring any extra filling into ramekins if needed.

• Bake for 15 minutes. Place a pie shield or tin foil over the top edges of the pie if desired.

• Reduce the heat to 350 F and bake for another 40-50 minutes until the custard is set.

• Cool on a wire rack for 2 hours.

• Refrigerate for longer storage.

Enjoy!

*Recipe Notes* If your canned coconut milk has the fat as a solid on the top, scoop the solid/pour the solid and liquid parts into a glass measuring cup. Heat slightly so the solid part becomes liquid, whisk to combine. Then you can measure out the 1 cup of coconut milk needed for this recipe accurately.

Favorite gluten free pie crust mixes:

1. ARNEL’S ORIGINALS GOOD & GLUTEN FREE – All Purpose Flour & Pie Crust Mix, Gluten free, Organic***

2. Cup 4 Cup Gluten Free Pie Crust

3. Gluten Free Mama’s Pie Crust Mix

4. Gluten Free Heaven Gluten Free Pie Crust Mix

Organic Elderberry Syrup

There is always more to learn when it comes to staying above the wellness line, supporting our health, supporting our immune systems, and doing so with nature’s medicine.

I naturally like to go against the grain, play devil’s advocate, and resist anything that is popular or trendy. Elderberry syrup is all the rage lately, and while I had bought a bottle years and years ago, before it was popular of course, I hadn’t given it much thought since I am covered with natural support with my essential oils, supplements, nutrition, and more!

But, I finally decided to do some research on Elderberry syrup, and in doing so I realized that my family and I were already taking a daily supplement and taking more when we were feeling off, that had even more powerful support for the body, and was less expensive than Elderberry syrup! I love when that happens!

Ningxia Red, has similar properties as Elderberry syrup with the added benefits of a complete amino acid profile, omega 3 fatty acids, protein, the ability to protect eyes from age-related diseases like macular degeneration, promoting liver and kidney health and cleansing, increasing energy levels, boosting the mood, and benefiting the reproductive system.

Ningxia Red also contains d-limonene adding extra immune support and more (go to google scholar and check out the benefits of d-limonene), as well as extra antioxidant protection, detoxification support, cleansing, and more.

Ningxia Red also contains freshly picked, fully ripe, organic Ningxia wolfberries, which are pureed to contain tons of fiber, and to ensure the nutrients remain intact and available. The essential oils help bring these nutrients and antioxidants to the cells as essential oils are lipid soluble, giving them the power to cross the cell membrane, and increase assimilation of any supplement they are added to! The difference between containing the whole fruit versus elderberry syrup, which only contains water that the berries were boiled and simmered in, is huge when it comes to antioxidant, vitamin, mineral, and phytonutrient properties.

Both elderberry syrup and Ningxia Red support heart and cardiovascular health, help stabilize blood sugar, promote regularity, improve immune function, and support healthy skin. Both have been used medicinally for thousands of years in ancient cultures.

Another difference between elderberries and Ningxia wolfberries is that elderberries are not edible in their fresh or dried form. They are toxic when uncooked and can only be safely consumed when cooked, or made into a tincture. Ningxia wolfberries can be eaten fresh, dried, made into tea, added to salads, granola, muffins, and more.

I concluded that my elderberry syrup would also contain Ningxia wolfberries and essential oils so that I could combine the best of both worlds for when we are under the weather. I still prefer the fresh, whole, pureed wolfberries in our daily Ningxia Red for prevention and daily antioxidant full body support, but may add a bit of elderberry syrup when someone in my family is sick, or I may just up their daily Ningxia Red intake and add in extra Thieves and Citrus oils, which is what I’ve been doing all along, I told you I like to go against the grain.

However you decide to use elderberry syrup, my recipe is below! Enjoy and have a healthy year!

If you want more information on Ningxia Red and Ningxia wolfberries, scroll past the recipe! To try Ningxia Red and/or Organic dried Ningxia Wolfberries click here to shop – https://www.youngliving.com/us/en/myaccount/wishlist?listId=6338f5a826f0be000acea9c1&enrollerId=3136396&sponsorId=3136396&userName=Amy

Organic Elderberry Syrup Prep Time 20 minutes. Cook Time 1 hour Total Time 1 hour 20 minutes Servings 2 – 3 cups

Ingredients

Instructions

  • Pour the water into a medium saucepan and add the elderberries, wolfberries, ginger, cinnamon,and cloves.
  • Bring to a boil and then cover and reduce to a simmer for about 45 minutes to 1 hour until the liquid has reduced by almost half.
  • Remove from heat and let cool until it is cool enough to be handled.
  • Mash the berries carefully using a spoon or other flat utensil.
  • Pour through cheesecloth (https://amzn.to/33QoalT) and a strainer (https://amzn.to/2PcZ6RQ) into a glass jar or bowl.
  • Discard the berries and let the liquid cool to lukewarm.
  • When it is no longer hot, add the honey and essential oils and stir well.
  • When the honey is well mixed , pour the syrup into a mason jar or glass bottle (I used these https://amzn.to/2Mxl7JC)
  • Store in the fridge and take daily, alternating days, or only when under the weather

Instant Pot option: Put all ingredients except honey and essential oils in pot, seal lid, and set manually for 9 minutes on high pressure. Vent pressure and strain. When cooled to room temperature, stir in the honey and essential oils.

Standard dose is ½ – 1 teaspoon for kids and ½ – 1 tablespoon for adults. If under the weather, take the normal dose every 2-3 hours instead of once a day until symptoms disappear.

NINGXIA RED and NINGXIA WOLFBERRIES

The Ningxia Wolfberry, the highest known antioxidant food, is extremely high in lutein and zeaxanthin, which are vital for preserving eye health by protecting vision from the free radical damage, protein destruction, and blindness that occur with age. 

Ningxia Red supports immune function, liver function, and eye health and increases energy. It supports brain and cognitive health as well as digestive health. Ningxia fortifies the cardiovascular system and supports healthy blood pressure levels while promoting restful sleep patterns. It aids the body’s natural anti-inflammatory response and enhances immune function. It also provides nutrients needed for healthy insulin sensitivity and promotes a feeling of satiety. Ningxia Red also supports proper muscle and joint health. 

It is the highest known protection against the dangerous superoxide free radicals, it is rich in ellagic acid, polyphenols, flavonoids, vitamins, and minerals. In addition, it has 18 amino acids, 21 trace minerals, beta-carotene, and vitamins B1, B2, B6, and E. It is an excellent whole-food source of nutrients that gives energy and strength to the body without harmful stimulants.

1 oz. of Ningxia Red has the same antioxidant power of:

  • 100 oranges
  • 814 blueberries
  • 22 carrots
  • 10lbs. of spinach
  • 59 broccoli florets
  • 73 strawberries
  • 93 apples

Some of Ningxia Red’s endless benefits:

  • Helps maintain healthy cholesterol levels 
  • Stabilizes blood sugar
  • Supports the immune system
  • Reduces absentmindedness
  • Major anti-aging properties
  • Great for digestion
  • Strengthens muscles and bones
  • Lots of Vitamin E, B, and amino acids
  • Detoxes kidneys and liver
  • Supports vision and eyesight and gives energy and vitality
  • Provides omega 3 fatty acids
  • Boosts energy naturally

The Ningxia Wolfberry is grown organically in the Ningxia Province of China, and pureed immediately after harvesting, at the peak of its ripeness.  The Ningxia Province of China is considered a Blue Zone, because 400% more people who are 100 years old and older, live without canes to get around or glasses to help them see, and they are overall much healthier and live much longer and in amazing health than most other places in the world. The locals in Ningxia China have been eating these berries for thousands of years. 

More about the Ningxia Wolfberry:

✭A “virtual vitamin capsule in the form of a fruit”, the Wolfberry contains over 21 essential minerals, 18 amino acids and extraordinarily high levels of thiamin (B1), niacin (B3) and vitamin C. It is the highest known food source of B1, and contains 2x the daily recommendation of vitamin C in 100 g of berries. 

✭Within the plant kingdom, the Ningxia wolfberry’s mineral profile and mineral balance are unparalleled. Minerals (calcium, zinc, copper, chromium, magnesium, potassium and manganese) are important for many bodily functions, but they must be properly balanced. The Ningxia wolfberry contains ideal mineral proportions: almost 1:1 magnesium to calcium, 2:1 zinc to copper, and 8:1 potassium to magnesium ratios. 

✭With a total of 15.6% protein by weight, the Ningxia wolfberry has more protein than bee pollen

✭ It is rich in amino acids L-arginine and L-glutamine. The wolfberry contains 1.4% of the branched chain amino acid L-leucine as well as significant amounts of tyrosine which is a key building block for dopamine production. Dopamine is an essential neurotransmitter in the brain that decreases with age.

✭21% fiber by weight, which means it has one of the highest percentages of fiber of any whole food. 

✭ The Glycemic Index is 29, compared to brown rice (66), millet (72), buckwheat (54). 

✭ It has been used in traditional Chinese medicine for more than 2000 years, and its use was first recorded around 200 BCE in Shen Nong Ben Cao Jing, an ancient book detailing the medicinal and agricultural knowledge of the mythical Chinese emperor Shen Nong. The Shen Nong Ben Cao Jing is the oldest book on Chinese herbs, and records 365 traditional herbs that are classified into three grades: (1) top, (2) middle, and (3) low. Wolfberry is one of the 120 herbs belonging to the top grade, which was believed to have remarkable health benefits. Long-term use of wolfberry was considered beneficial for strengthening the body, keeping fit, prolonging life, and easing life through all the seasons.

Ingredients in Ningxia Red: Ningxia Wolfberry puree, pure Orange, Yuzu, Lemon, and Tangerine essential oils, along with blueberry, aronia, cherry, pomegranate, and plum juices 

*Halal and Kosher certified

Drink 1 – 2 oz. a day for optimal health, and more when your body needs extra support

HOW TO ORDER

Click the Button Below, then:

Shop for whatever items you would like to order. Add them to your cart and checkout. To unlock a 24% discount for a year be sure your order totals 100PV or more. The other way to unlock a 24% discount is by adding at least one item in your order to loyalty. I highly recommend adding your favorite Young Living supplements to loyalty since we always need those! To learn more about the Young Living supplements click here – https://www.youtube.com/channel/UCtR4VeqEv20WoMkBeD8nndg . But keep in mind you can change what’s in your order every month so you can add something different to try each time if you’d like. Either way you get the 24% discount. Or, you can pay full price if you prefer. But at anytime you are able to unlock that 24% off by doing one of the things I mentioned above.

Then simply checkout! If you are shopping without my link put 3136396 in the spot for referral ID.

Your order will be shipped directly to you.

Once you order, email me at amystanfordnutrition@gmail.com to let me know.  I will add you to our private education pages on Facebook and Instagram, and send you recipes, resources, books, and tools to help you get started!

Email me at any time before, during, or after you order with any questions you may have!

My Homebirth Experience

What led me to homebirth?

After 2 traumatic hospital births, traumatic for different reasons, hard life lessons learned in taking back my power, and not trusting in others as I had before the birth of my first two babies, and with the support of my husband, I knew that if I were to have a third baby, I would have a homebirth.  

I knew I wanted to remain in the comfort of my own home, with my own things, my own people, being able to labor in peace without having to go anywhere or do anything that didn’t resonate with my body and my intuition, and allow my body to do what it innately is made to do.  

I knew that when my baby came into the world I wanted to have 100% control in what happened next.  I wanted my baby’s gut to be populated with our family’s bacteria and not the bacteria in the hospital.  I knew I wanted the cord to remain connected for as long as possible.  I knew I didn’t want any vaccines, eye drops, injections, baths, anything intrusive to my new baby.  I also knew I wanted full control of my own body.  To birth in whatever way, position, time, my body desired.  I didn’t want to be poked, prodded, made to lie down, anything intrusive happening to my body during the birthing process.

I knew that fear is what leads to pain, and that pain could be greatly reduced or eliminated with the elimination of fear.  Being allowed to fully tap into the primal instinct, the body’s release of endorphins, and staying in my comfort zone would lead to a much better labor, delivery, and after birth experience.   

How did I find a midwife?

A friend of mine had previously had a homebirth, so I asked her for recommendations.  She told me who she used and why she chose the woman she chose.  She also told me about another midwife and the pros and cons of using her as well.  I researched both of these women, met with one of them, and decided she was the fit for me and our family.

How did my pregnancy look as far as appointments and doctors’ visits?

At the beginning, I started meeting with my midwife, and a regular ob/gyn through my insurance.  For the first 4 months, I continued meeting with both.  I was very uncomfortable meeting with the regular ob/gyn because I felt like I was always saying no, turning down tests, vaccines, etc. When I told my ob/gyn about my homebirth plans, he was very unsupportive and even threatened me, saying that if something were to go wrong and I showed up at the emergency room, that no ob/gyn would help me because I had started off as a homebirth. He tried to place fear in me. He tried and tried to convince me to have a hospital birth, have every test and vaccine, etc. etc.  I had a dream one night that I asked my midwife if I could stop going to my ob/gyn visits and she said yes, and I was so relieved.  I told her about my dream, and she said “you can stop going to see your ob/gyn”.  It was such a relief.  No more feeling like a criminal, feeling like a lawyer pleading my case, and being uncomfortable with every doctor visit.  From that point on I never went to the ob/gyn again.  

What was my experience like?

I absolultely loved having a homebirth.  My midwife came to my home for all of my prenatal visits.  She allowed my other 2 children to listen to the baby’s heartbeat, she answered their questions, she explained everything, got to know me and our family intimately, asked tons of questions, answered any and all questions, recommended books, classes, research articles, and educated us on every last detail of everything.  

We chose to have a water birth.  My first two babies came early (3 weeks, and 2 weeks early), so we had the birthing tub blown up and ready to go by the time I was 37 weeks along.  I believe for many reasons my son came late.  There was no pressure from a doctor to induce, schedule anything, etc.  There were no internal checks to see how dilated or effaced I was.  There was no pressure from anyone or anything.  My baby and I were allowed to do things when both our bodies were ready. 

The night I went into labor I was dreading the next day.  My husband, who is a firefighter, would be working a 24-hour shift and leaving me with a 3-year-old and a 6-year-old.  I was dreading walking up the hill to softball practice, because by this point walking was nearly impossible.  I was at 40 weeks 5 days, and at 5’ 1” with a giant watermelon in my belly, I was very uncomfortable.  

We went to bed, and as soon as I laid down, I had a very painful contraction.  I laid there breathing through it and waited to see if there would be another one. Sure enough, another contraction came shortly after, and I knew this baby was coming fast.  My husband called the midwife and started filling up the birthing tub.  He prepared the bed with a tarp under sheets that we didn’t care if they got stained, and I worked through my increasingly painful contractions.  I went into a la-la land zone pretty quickly.  It was like an alternate universe where I was loopy, groggy, and in my own world.  The tub couldn’t be filled up right away as we ran out of hot water.  Eventually when the tub was filled I immediately got inside. The midwife and her assistant arrived and began setting up.  I absolutely loved being in the water, but during each contraction I felt the urge to stand and lean on my husband.  My torso is extremely short, so by standing and elongating my torso, baby and I were more comfortable during each contraction and we had gravity on our side. After a while I asked what was happening (remember the alternate universe). They told me I was having the baby and I said “oh, thank god.”

After a few hours, I said I felt like I needed to go to the bathroom. Everyone encouraged me to make my way to the toilet.  That idea sounded awful as I didn’t want to get out of the water.  We went back and forth like this for a while and my midwife kept ensuring me that the pressure I felt was the baby ready to be born. I knew she was right, but I also knew what else would be coming out with the baby and didn’t want to do that in the water, yet didn’t want to get out of the water. Eventually they convinced me to get on the pot. They placed me on the toilet straddling it, facing the toilet tank with my arms resting on the tank.  They gave me a spoonful of honey, for a little power, and had me smell peppermint essential oil while eating the honey so as not to become nauseous.  The first contraction that I had on the toilet brought with it a deep, guttural, Amazonian yelp that came out of nowhere.  I immediately worried about my daughters (who were asleep in the other room) being woken up, and asked someone to please close the bedroom door.  My midwife knew, from that sound that had emitted from my being, to take a look below, into the toilet bowl, and sure enough my little guy was out to his eyebrows.  Well at this point, I couldn’t walk back to the tub, so my husband lifted me off the pot and placed me back into the birthing tub.  I rested my head on my arm on the edge of the tub.  I was on all fours and asked for someone to hold my hand. My midwife held onto my hand, my husband got into position to catch the baby, and on my first contraction back in the water my sumo wrestler baby flew out (poor guy had been wanting to come out for a few hours).  All in all, it was 3 hours and 56 minutes from my first contraction as I laid down to go to bed, to when Grant was born.  My husband caught him, but there hadn’t been time for the midwives to explain how things work when baby shoots out behind mom.  My husband instinctively raised Grant up and out of the water. But I was still on all fours with my sweet baby behind me and no way for me to see him.  With the help of my midwives lifting my leg over the umbilical cord and my husband maneuvering the baby under my leg I was able to hold him for the first time.  My first thought was that he looked like a football player.  Big, broad shoulders, huge hands, chubby face (he was 9 pounds and 22 1/4 inches long).  But my euphoria was short lived as I began having contractions again.  Ugh, I thought and said “I’m having contractions”.  My midwife explained that it was the placenta.  I was unable to deliver the placenta laying in the tub, so I had to give my sweet baby to my husband while I stood up to deliver the placenta, thanks gravity!

I made it to the bed, and was able to nurse my sweet boy and snuggle in the comfort of my own bed.  My girls were able to meet their new brother that morning when they woke up.  They had gone to bed without a brother and woken up with a new baby brother.  

Homebirth aftercare is impeccable!

The aftercare may have been the part of the experience that was the most awe inspiring.  Not only did my midwife take expert care of my baby and I physically, the care for my emotional health was amazing.  I was encouraged to write down my birth story.  Triumphs, disappointments, positives, negatives, every emotion.  I was asked about my emotional health, offered advice and encouragement, cared for on such a deep level, and was allowed to heal mentally, physically, and emotionally at my own pace, provided with the tools, resources, and support to do so.  

Hindsight is 20/20 

In hindsight, there are a few things I would have done differently. I would have definitely hired a birth photographer, and a doula.  At the time, I thought that paying for the midwife and homebirth as well as the hypnotherapy classes was already going a little overboard.  Now, I realize how amazing both of these things would have been. I also, would have paid to have my placenta encapsulated.  While I seriously considered this, and did save my placenta (we ended up burying it in the backyard under a fruit tree), I looked at it as an extravagant expense. This would have been a priority over a doula and birth photographer if I were to have another baby.  I tend to lose more blood than I should during childbirth, and having my placenta encapsulated I believe would help me so much in gaining back strength and healing more quickly.  

This is some of my homebirth story.  I highly recommend homebirth to anyone considering it.  I am open to any and all questions regarding homebirth. Feel free to comment here or email me at amystanfordnutriton@gmail.com.  If you are local to the Inland Empire and are looking for someone to pick up your placenta and encapsulate it for you, I highly recommend Toni Kinsman Consulting.  If you are local to the Inland Empire and are looking for midwifery services I highly recommend Lisa Marie Sanchez Oxenham of Sacred Journey Midwifery,  Karen Pecora of Blessed Beginnings, and Karen Baker of Birthsense and Beyond.  Wishing you all empowerment and strength in your womanhood.  

Making Raw Sauerkraut

Let’s talk probiotics

A perfectly healthy person (do they even exist), has approximately 100 trillion microorganisms from 400 different species flourishing in their intestinal tract aiding in digestion, absorption of nutrients, and the production of B vitamins, vitamin K, and enzymes.

These beneficial bacteria crowd out harmful bacteria and allow your body to work optimally. 

Levels of these beneficial bacteria need to be maintained throughout life by consuming cultured/fermented foods, prebiotic foods, and probiotic supplements (if one does not consume adequate amounts of fermented foods and/or is ill or recovering).

Levels of good bacteria in the gut can decline for many reasons including taking antibiotics, taking NSAIDS like Advil, Motrin, Midol, etc., taking birth control pills, due to chlorine in drinking water which kills bacteria in the water as well as your intestines, changes in the acid/alkaline balance of the bowels, a diet low in vegetables, fruit, and whole grains, radiation and chemotherapy, and many other ways.

Conditions associated with low levels of beneficial bacteria include acne, ADHD, allergies, anxiety, arthritis, asthma, bladder and urinary tract infections, breast pathologies, cancer, cardiac problems, chronic fatigue, Colitis/Crohn’s disease, colon cancer, compromised immunity, constipation, depression, diarrhea, diverticulitis, ear and respiratory infections, foul breath and body odor, gastritis, headaches, hormonal imbalance, IBS, liver and gallbladder problems, migraine headaches, PMS, sinus problems, spastic colon, stomach bleeding, and yeast infections.

Probiotics are found in fermented foods such as raw sauerkraut, beet kvass, kefir, etc.

It is fun and easy to make your own raw sauerkraut and fermented vegetables!

Here’s a super easy recipe that kids love to help with and also love to eat!

Grant making sauerkraut!

Raw Sauerkraut

Yields about 2 quarts

Ingredients
2 large heads of organic cabbage (red or green)
2 – 3 tbsp sea salt

Directions
1. Grate, shred, or finely cut 1 cabbage and place in a crock (here are a few great crocks https://amzn.to/2t6E8Ia, https://amzn.to/2GkNFmQ, https://amzn.to/2Dd0NaG, https://amzn.to/2DaHvCz), or large pot. Sprinkle half of the salt over the cabbage.

2. Grate, shred, or finely cut the second cabbage, then add it to the crock along with the rest of the salt.

3. Crush the mixture with your hands until liquid comes out of the cabbage freely (kids love helping with this part).

4. Place a plate on top of the cabbage, then a weight on top of the plate (a weight can be a small glass jar filled with water).

5. Cover container and check after 2 days. Scoop the scum off the top, repack, and check every 3 days. After 2 weeks, sample the kraut to see if it tastes ready to eat. The flavor will continue to mature for the next several weeks.

6. Canning or refrigerating the sauerkraut will extend its shelf life.

Optional ingredients to add:
• 5 cloves of chopped garlic and 2 sliced onions
• 3 sliced poblano peppers 🌶 
• 5-10 chopped Brussels sprouts
• A handful of seaweed or any other vegetable 🥕
Add optional ingredients in when adding the salt.

B12 Injections and Recovery

Let’s talk butt vites!

Yes, that’s right, I said butt vites!

Let me explain! When we were healing this little cutie, pictured above almost one year after we began her healing journey, one of the interventions we tried was B12 injections.

At the age of 18 months we began administering B12 injections into her tushy every 3 days. The healing was mind-blowing. Within days of her first injection she began speaking in complete sentences and her amazing attention span returned.

We continued with the B12 injections for over a year, and it helped so much with her attention span, communication, and her mood! We lovingly referred to them as butt vitamins, which then became shortened to butt vites.

The Importance of Vitamin B12

Vitamin B12 is required for cell formation, energy metabolism, immune function, nerve function, proper digestion, protein synthesis, and metabolism of carbohydrates and fats. Methyl B12, or methylcobalamin, is a methyl donor.  Methylation is a vital biochemical reaction in the body that supports the cardiovascular, hormone, immune, and detoxification systems, DNA/RNA structure and function, and other key metabolic systems.  For autism, it is recommended that methyl-B12 be administered through an injection in order to be most effective.  If the effect is positive, it should be noticed within a few days. According to the Autism Research Institute’s parent survey, parents reported improvement with methyl-B12 63% of the time. For those not ready for injections, or those not working with a medical practitioner, sublingual methyl-B12 can be used, although results may not be as pronounced as with injections.

Food Sources of Vitamin B12 include eggs, milk, cheese, milk products, meat, fish, shellfish and poultry.

How Methyl-B12 Helps Those with Autism

Metylcobalamin, or methyl-B12 can have an extraordinary impact upon the methylation process, and can help with the detoxification of heavy metals.  Many children with ASD have high levels of heavy metals, particularly mercury in their bodies.  The presence of mercury in the body, blocks the body’s own formation of methy-B12, and this often prohibits the body from solving the heavy metal problem by itself. When methyl B-12 is administered, the processes of methylation and reduced glutathione formation can occur, and heavy metals can be eliminated.  In addition to improving detoxification, other benefits of enhanced methylation include, improved cell membrane function, improved neurotransmitter and hormone metabolism, and improved neuronal healing. Administering methyl B-12 to those with ASD is not recommended due to a deficiency of B12, but to bypass metabolic blocks, and to jump-start metabolic processes and neuronal healing.

Common Improvements Seen with Methyl-B12 Injections

Improved executive function, speech and language, and appropriate emotion and socialization skills. Methyl-B12 seems to unlock the areas of the brain that are required to verbalize and communicate effectively. It is not uncommon to see improvements in expressive, receptive, and conversational language as well as the ability to make longer sentences that include pronouns, adjectives, adverbs, etc. Methyl-B12 is known to increase eye contact, focus, attention, awareness, comprehension, and the ability to understand abstract ideas and concepts. The children become more tolerant of change, transition much more easily, and become more flexible. They are able to communicate their wants and needs more effectively. Methyl-B12 improves their ability to stay on task and the ability to follow more complex commands. It helps with imaginative play, imitation skills, and engagement with others. Often, children become more in touch with their feelings and the feelings of others. Interests are widened, the children become more inquisitive and they try new things. They become more self-confident, opinionated, and their need to be independent is heightened. The children learn more easily, their memory improves, and things that parents did not even know their children knew are now expressed to their parent’s surprise. The children become much more affectionate, cuddly, and loving, and they have many more good days at home and school. In addition, methyl-B12 is known to improve the immune system, decrease allergic responses, and it often helps appetite, aids in increasing weight, and frequently helps gross and fine motor skills.

Important Information 

It is crucial that no other changes are made to one’s treatment program during the first 6 weeks of methyl-B12 injections.  Nothing should be added or removed/reduced so that parents are able to evaluate the progress of their child based on the B-12 injections, without any other factors being responsible for these changes.  When B12 injections are administered this way, 94% of parents documented improvements in their children’s mood, behavior, speech, cognition, interaction, etc.

How to find a MAPS, DAN, or Functional medicine doctor experienced in Biomedical treatment of autism in your area.

Visit the following websites for lists, contact information, and resources:

  • generation rescue.org
  • tacanow.org
  • autism.com
  • nationalautismassociation.org
  • members.bioindividualnutrition.com – practitioner directory

fullsizeoutput_6b20
Sweet baby girl at the beginning of her journey with B12 injections!

Don’t Toss Your Greens!!!!

Did you know that beet greens are higher in nutritional value than beetroots??

Beet greens are higher in calcium, iron, and vitamins A and C.  They are an excellent source of folic acid (hello pregnant mamas), and a very good source of fiber, manganese, and potassium.  

Both beet greens and roots are a good source of magnesium, phosphorus, iron and vitamin B6.  

Beetroots have long been used for medicinal purposes, aiding in liver detoxification.  Beet roots contain betacyanin (the pigment that gives them their color), which is a powerful cancer-fighting agent.  Beet fiber aids in bowel function and helps balance cholesterol levels.  

Beets have been shown to increase antioxidant levels, specifically levels of glutathione peroxidase and glutathione-S-transferase, and increase the number of white blood cells responsible for detecting and eliminating abnormal cells.  

I invented this recipe one winter when I was craving beets!  As is not always the case, I loved it, and so did all of my children!

Read below for more benefits of enjoying this recipe with your family!

It contains:

Garlic:  An excellent source of vitamin B6, manganese, selenium, and vitamin C.  Garlic is also a good source of phosphorous, calcium, potassium, iron, and copper.  Garlic provides protection against atherosclerosis and heart disease. Studies have shown that garlic decreases total serum cholesterol levels while increasing serum HDL-cholesterol levels which is a protective factor against heart disease. Garlic has also been shown to lower blood pressure. Garlic has antibacterial and antimicrobial properties and has also been shown to provide protection against some cancers.

Greens: Greens are among the most highly nutritious vegetables.  They are an excellent source of carotenes, vitamins C and B6, and manganese.  Greens are also a very good source of dietary fiber, copper, iron, calcium, and vitamins B1, B2, and E. Greens have anticancer properties, and are high in chlorophyll and carotenes, especially beta-carotene, lutein, and zeaxanthin.  Greens have almost 3 times as much calcium as phosphorous, which is beneficial since a high phosphorous consumption reduces the utilization and promotes the excretion of calcium.

Apple Cider Vinegar: Apple cider vinegar reduces rise in blood sugar after meals. It’s excellent for those at risk of type 2 diabetes.

Organic extra virgin olive oil: An excellent source of oleic acid, an omega-9 monounsaturated fatty acid.  It is also a good source of vitamin E, as well as oleuroprein, a phenolic compound which has been reported to have anti-cancer properties, and flavonoids.  Olive oil reduces the risk of chronic and degenerative conditions such as atherosclerosis, diabetes, colon cancer, asthma, and arthritis, as it helps in lowering systemic inflammation.

At last, the recipe!

Beets with Onion, Garlic, Beet Greens, and Apple Cider Vinegar

This is a delicious and very nutritious vegetable dish, which can be prepared ahead of time and eaten as a cold salad or reheated by sautéing for a few minutes over low-medium heat.

Makes about 6 – ½ cup servings

Source: Amy Stanford Nutrition

 Ingredients

  • 3 red beets with greens attached (roasted, skinned, and chopped into ½ inch cubes)
  • 2 cups chopped beet greens (can substitute collard greens, kale, rainbow chard, etc.)
  • 4 garlic cloves minced
  • 2 tbsp. olive oil
  • 1 – 2 tbsp. Apple Cider Vinegar or to taste
  • Celtic or Himalayan sea salt to taste

Instructions

  1. Preheat oven to 400
  2. Remove the greens from beets. Wash the beets and cut off both ends.  Wrap in parchment paper and then wrap in aluminum foil.

  3.  Place in 400 degree oven for 1 hour and allow to cool or store in refrigerator until ready to make the recipe (can be stored in refrigerator for one or two days before completing the recipe).
  4. Once cool, remove skin and chop into ½ inch cubes
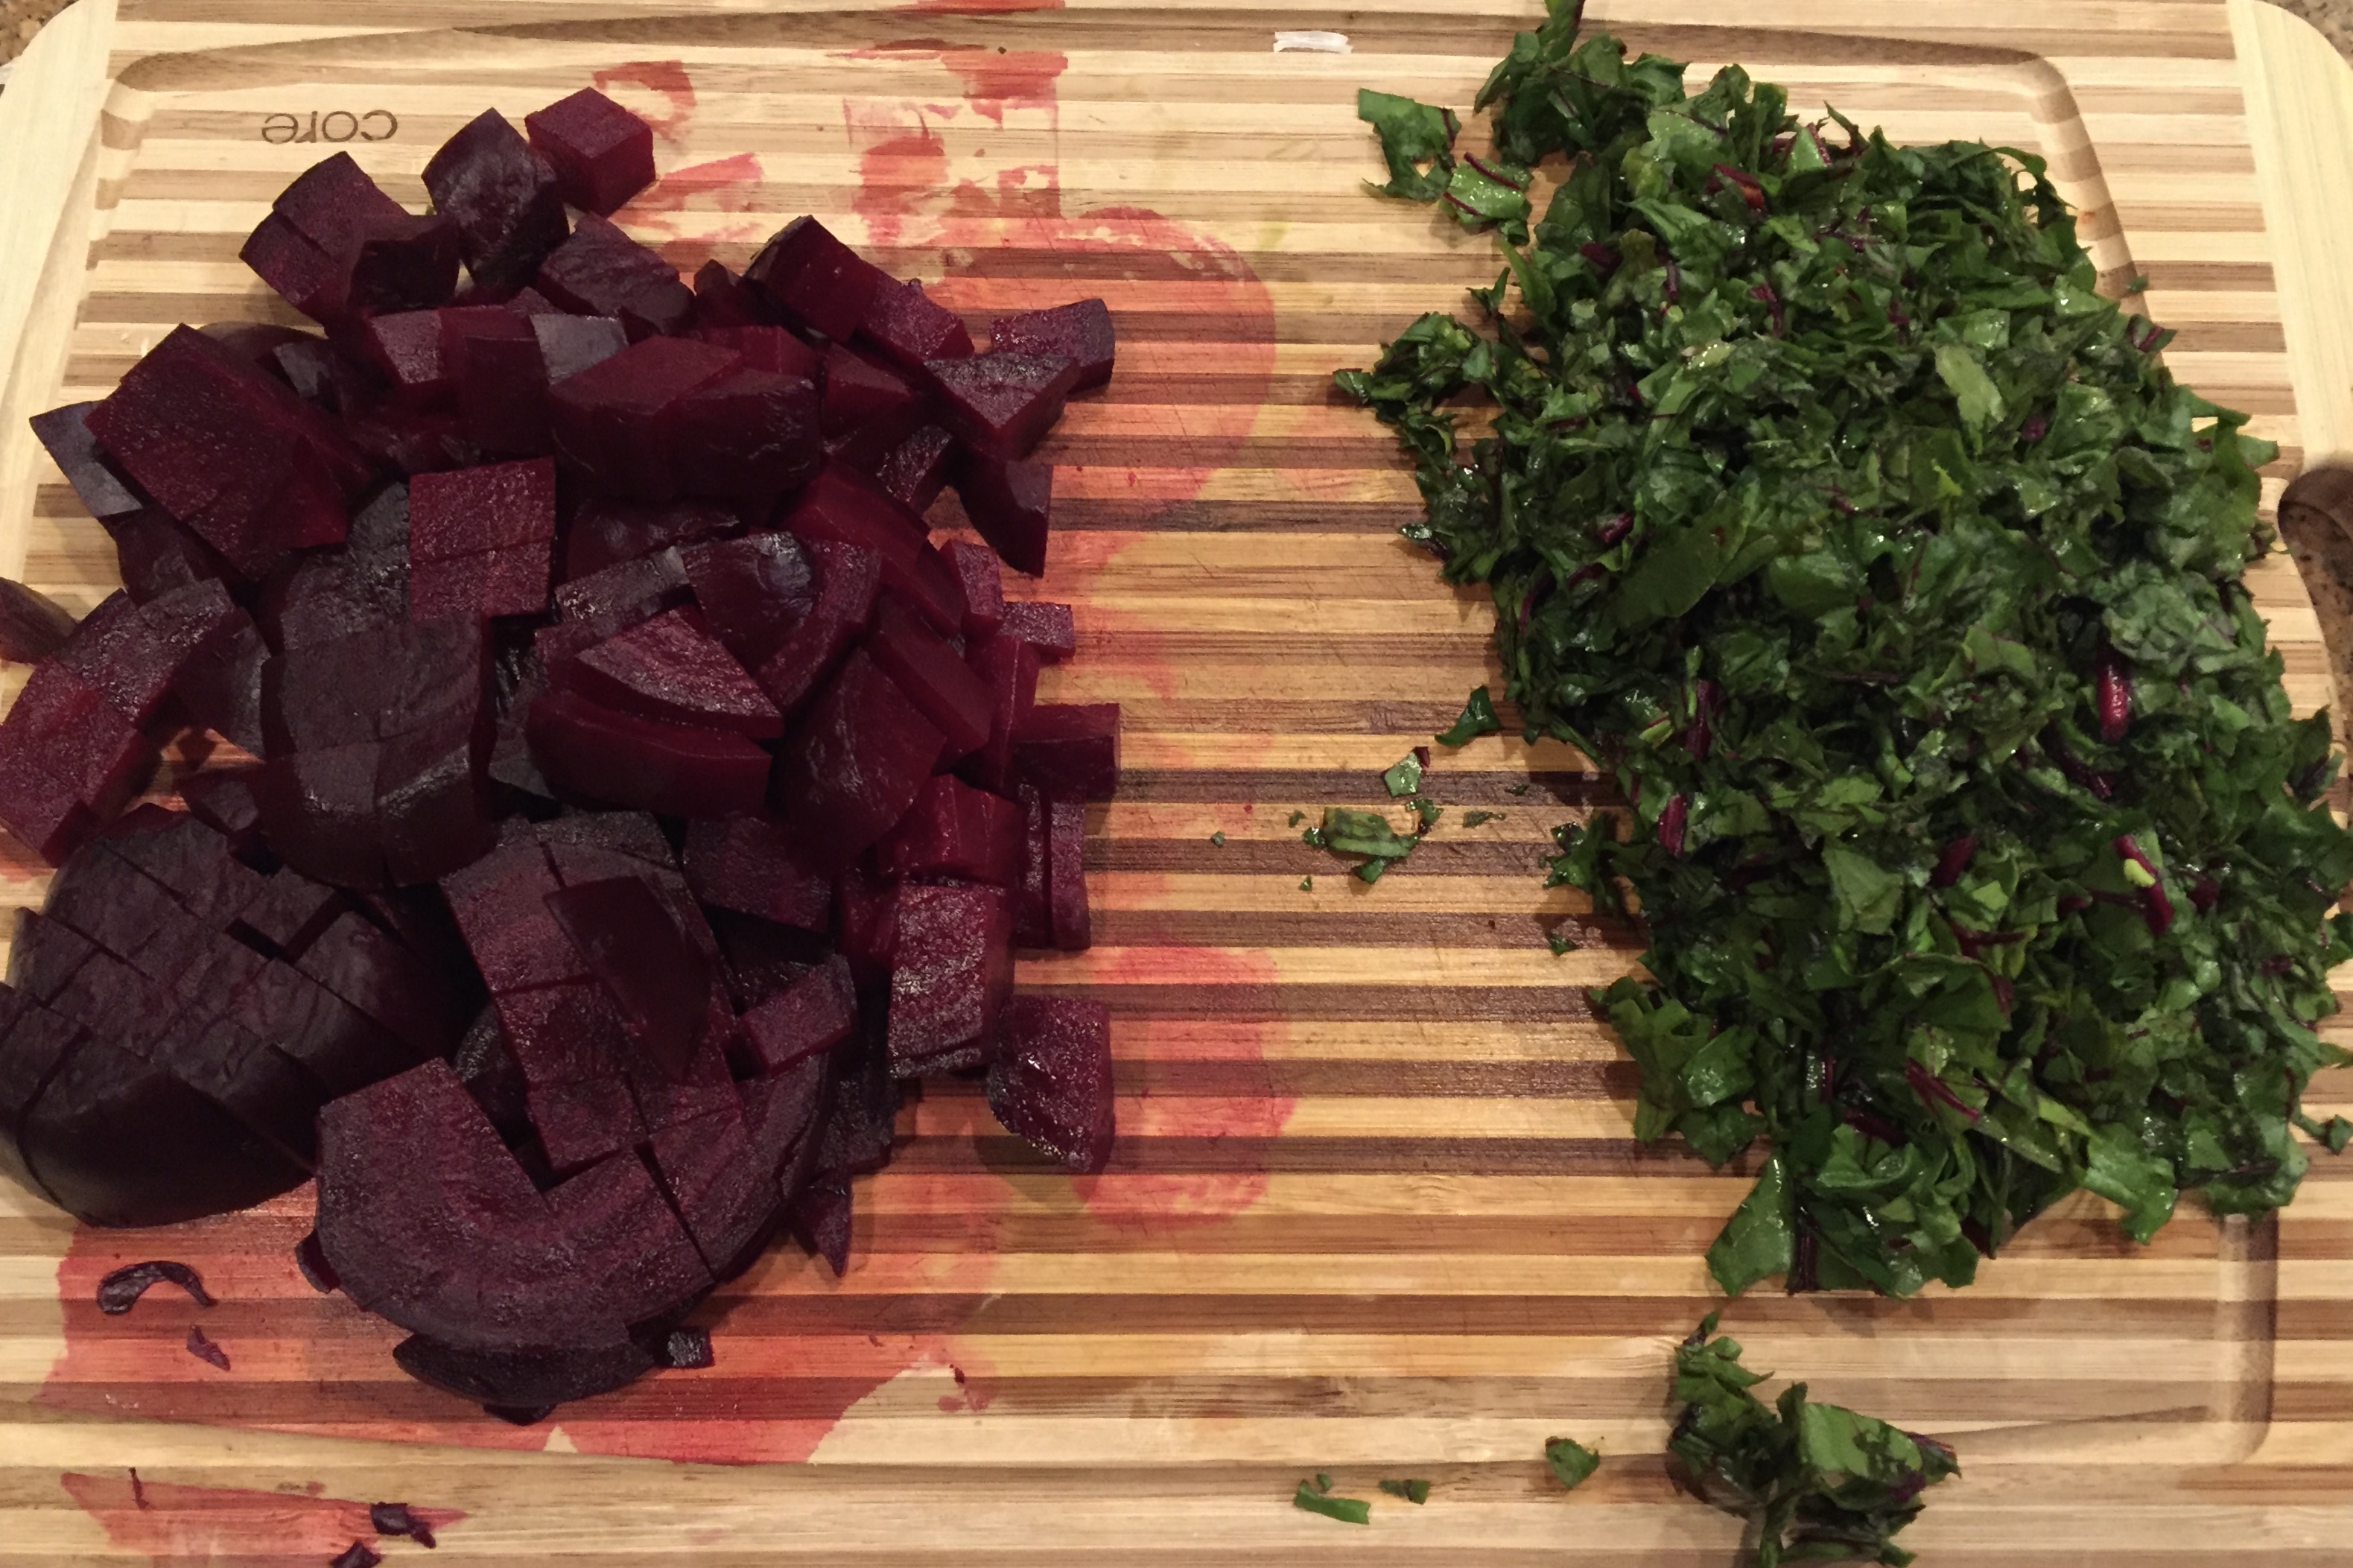
  5. Wash and chop beet greensIMG_9486
  6.  Mince garlic cloves
  7. Warm 2 tbsp. olive oil on medium heat in a sauté pan Sauté garlic for 2-3 minutes
  8. Add beet greens and sauté for 2-3 minutes moreIMG_9488
  9. Add chopped beets and sauté for 5 minutes
  10. Add apple cider vinegar and salt to taste

Enjoy!!!!